
The Window Cill: The Most Neglected Part of a Sash Window
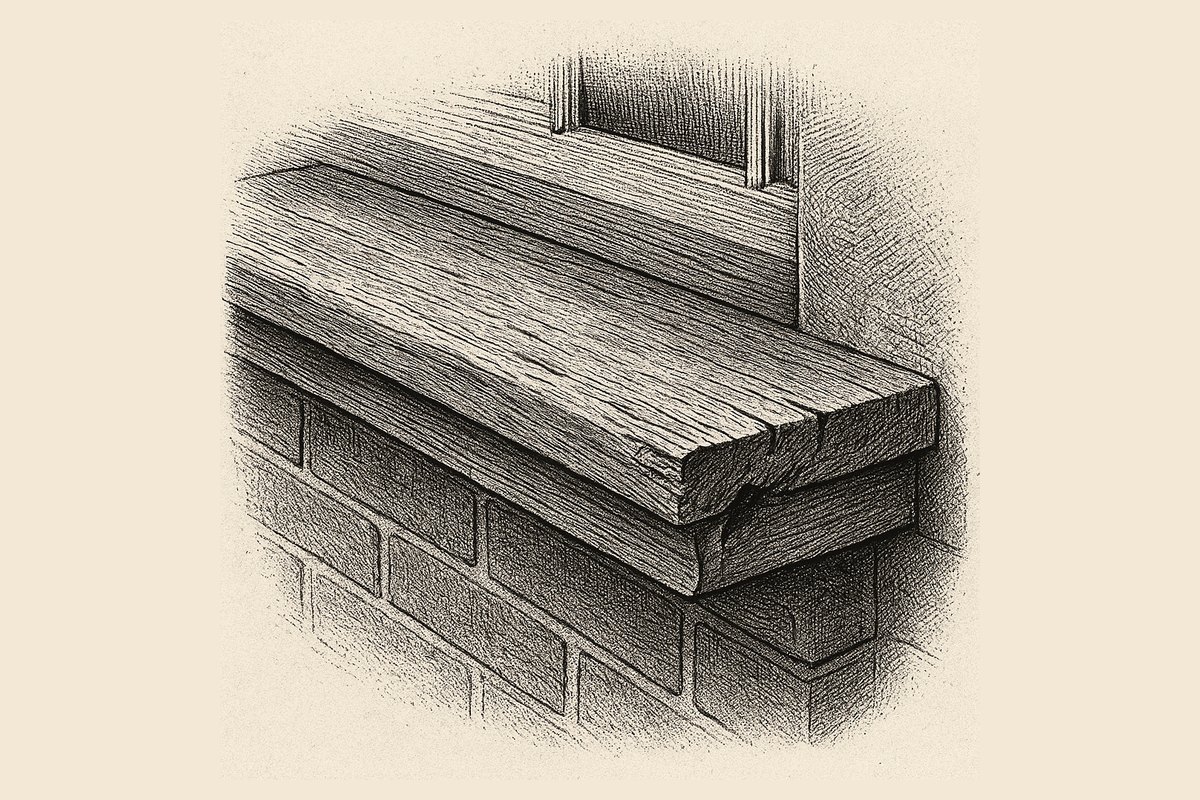
Watch a sash joiner start a survey and he will not begin with the sashes. He puts a bradawl into the cill about 20mm in from each reveal, leans on it lightly, and reads what comes back. Of everything in a box sash the cill is the only part that is structural and permanently in the weather at once, and what the bradawl finds is the difference between a morning with a chisel and a job that takes both sashes out and the frame propped.
Ten minutes with a bradawl and a torch
Take the same reading on a dry day, at least two days after rain, so you test decay rather than a wet surface.
- Sight along the cill at eye level from one end. You are looking for a dish or a sag in what should be a straight, falling line. Either means the section has lost strength or the ends have dropped.
- Press the bradawl in with light hand pressure, 20mm from each reveal, then at roughly 150mm intervals along the front edge. Sound timber takes the point a millimetre or two. If it sinks 4mm or more without you leaning on it, that is decay.
- Tap along with the handle. Sound timber gives a sharp knock, decayed timber a dull thud, and you hear the change at the boundary.
- Run a fingernail along the underside, about 10mm back from the front edge. If your nail does not drop into a groove, the drip has been painted or filled shut.
- Check the two housing joints where the pulley stiles meet the cill. Any open line you can slide a business card into is a water route into the box.
- Look at the wall below. A vertical dirty streak or rust-coloured stain means water is running down the face of the building instead of dropping clear. Damp inside at skirting level means it has been getting in a while.
The pattern matters more than any one reading.
| What you find | What it means | Likely repair |
|---|---|---|
| Crazed, flaking paint, timber sound underneath | Paint failure only, water has not yet got in | Strip back, prime, repaint |
| Bradawl sinks 3–6mm in one patch under 150mm long | Localised wet rot, section still intact | Cut out and resin repair |
| Soft at one or both ends, sound in the middle | End grain decay from the reveals | Splice new timber into the ends |
| Soft along more than a third of the length | Section compromised | Full cill replacement |
| Housing joints open, stile feet soft to the bradawl | Water is in the box, not just the cill | Cill plus stile foot repair, sashes out |
| Drip groove painted shut, otherwise sound | Cause not yet effect | Re-cut the groove, repaint |
Why the cill goes before anything else
Every other part of the window has something in front of it: the glass has putty, the sashes have the reveal, the box has the wall. The cill has nothing, and it is doing three jobs at once.
It sheds water: the top face is cut at a fall, called the weathering, so rain runs outward instead of pooling against the bottom rail. Thirty years of repainting slowly fills the low end of that fall, and a cill that once shed water starts holding a puddle a millimetre deep along its back edge.
It throws water clear of the wall: the cill projects past the brickwork, usually 40mm or so, and cut into its underside near the front edge is a groove called the drip, or the throating. Water tracking back along the underside by surface tension meets that groove, the tension breaks, and the drop falls. Bridge it with paint, or worse with mastic, and every drop landing on the cill goes straight to the joint between timber and masonry.
And it carries the frame, the part people miss. The cill is not a trim. The two pulley stiles that house the weights are wedged into housings cut into it, and the whole box stands on it. When the cill goes, the stile feet go with it, the box loses its squareness and the sashes bind.
Cill, sill, window board, sub-cill
Both spellings are correct: the trade writes cill on drawings, general English writes sill. The distinction that matters is between parts. The window board is the internal shelf you put a plant on, the cill is the bottom member of the frame outside, and under it on many London houses sits a stone, concrete or brick sub-cill built into the wall. Our illustrated glossary of sash window parts names the rest if the terms are new.
Five places decay starts, roughly in order of frequency:
- The ends. The end grain is buried in the reveal, often bedded in cement mortar that holds water against it. End grain drinks, which is why the bradawl goes in there first.
- The joint with the pulley stile. Water sitting on the weathering wicks into the housing, a tight timber-to-timber junction that never dries. This is the joint that turns a cill repair into a frame repair.
- The underside. Nobody paints it properly, because you cannot see it from a ladder, and the drip groove is the first thing a lazy brush bridges.
- Under the bottom rail. If the sash has dropped, or the rail has lost its weathering, the two timbers sit wet against each other whenever it rains.
- Behind mastic. Somebody seals the cill to the brickwork all round with silicone. Water still gets in at a shrunk corner, and now cannot get out.
All five are drainage failures rather than timber failures. The SPAB's advice on timber-decaying fungi puts it plainly: dry timber is immune to attack, so the first move in arresting decay is to eliminate the causes of dampness and get the moisture content below 20%. Worth remembering when somebody tells you the window is past it, because the softwood in these frames is slow-grown Baltic redwood, tight-ringed and high in heartwood. It did not rot because it is old. It rotted because it was wet, and our piece on what wet rot does to sash joinery covers why.
Resin, splice, or a new cill
Resin repair suits localised loss. Two-part epoxy compounds made for joinery, Repair Care's Dry Flex range among them, stay elastic enough to move with the timber rather than shearing off it the way ordinary filler does. Done properly it is not bodging: decay cut back to sound timber, a consolidant applied, the compound shaped and sanded to the original profile. Done improperly, meaning filler troweled over soft timber and painted, it hides the rot for two winters and then falls out with a lump of cill attached.
Splicing, or a scarf repair, is the right answer for end-grain decay and anything up to roughly half the section. The rotten portion is cut out on a long angled joint, matching timber is glued and screwed in, and the weathering and drip groove are worked through the new piece so the profile runs unbroken. A good splice is invisible under paint and lasts as long as the parent timber. Same operation as splicing timber into a rotten frame.
Full replacement is a bigger job than it sounds, and this is where quotes diverge. The sashes come out, the beads come off, the frame is held while the old cill is cut out in sections, and the new one is worked to take the stile housings before it goes in. On a first-floor London sash that is the better part of a day, usually with a second pair of hands for the sashes and a tower or scaffold to work off. Anybody quoting an hour for it is planning to face over the old cill, which puts new timber on wet timber and buys you eighteen months.
Rule of thumb: if more than about half the section has gone, or the pulley stile feet are soft as well, replace rather than repair. Below that a splice is better value and keeps more original fabric. Never bridge decay with filler and paint. It does not stop the fungus, only your view of it.
Specifying the timber, and what to insist on
You want density and heartwood, the grain running the length of the cill, and the rings oriented so it does not cup.
- Redwood (European pine) matches the original and takes paint beautifully, provided you get slow-grown, high-heartwood stock. Fast-grown modern softwood with six rings to the inch is a false economy here.
- European oak heartwood is a durable timber, class 2 on the EN 350 scale, and will outlast softwood comfortably. It is heavier to work, and it will stain adjacent masonry with tannin for a year or two, worth knowing before it goes in rather than after.
- Sapele is often offered as the cheaper hardwood. It is only moderately durable, class 3, so on an exposed cill it depends on the paint system being maintained. Not fit-and-forget.
- Accoya, acetylated softwood, is class 1, the top of that scale, and the manufacturer warrants it for 50 years above ground. It barely moves with humidity, which is what you want in something that soaks and dries repeatedly. It costs noticeably more per metre and needs stainless fixings, but on a cill the premium is easier to justify than anywhere else on the window. We weigh it up in our note on modified timber for sash joinery.
Whatever the species, insist every face, including the underside and both end grains, is primed before the cill goes in. One primed in place has an unprimed back and unprimed ends for life.
What it costs, and why two honest quotes differ by hundreds
Ranges only, because access dominates the price and no two London elevations are the same. Published London price lists put a cill splice at £180 to £300 per window and a full cill replacement at £250 to £450. Those figures are honest, but read what they are attached to. They are overhaul rates: sashes already out, beads already off, a joiner on site for the day doing cords, pulleys and draught seals as well, and the cill one line on a list of ten. Priced that way it carries only its own marginal hours and its own timber.
Booked on its own, the same cill carries the whole visit: travel, parking, the congestion charge, setting up and making good, plus the second pair of hands for the sashes. That is why most London sash firms hold a minimum charge of half a day or more. On that basis a one-off first-floor cill replacement realistically lands around £600 to £900 before access, and access sits on top. A short tower hire is usually a few hundred pounds; scaffolding a townhouse front is a different order of money. Our breakdown of what each sash repair should cost sets the same logic out job by job.
So one quote comes back at £400 and the next at £1,100, and both firms can be telling you the truth. Ask which of the two you are being given. If more than one window needs attention, batching them into one visit moves the per-window figure further than anything else here, because the expensive part of a standalone cill is the visit rather than the cill.
Which rules apply to a cill repair
Fewer than people assume, worth knowing before somebody sells you compliance you do not need. Repairing or splicing a cill in an existing box frame is not providing a controlled fitting under the Building Regulations, so the replacement-window energy standards do not bite and no competent person scheme certificate exists for the work. A firm offering you a FENSA certificate for a cill repair is selling something that does not apply to it, as our guide to what building regulations cover on window work sets out.
Listed buildings and conservation areas run on a separate system. Like-for-like repair matching material, profile and technique is normally treated as not needing listed building consent, but that judgement belongs to your conservation officer rather than to a national rule, and councils differ on how much decayed fabric they will let you renew before it stops being repair. A cill worked to a stock section rather than the original moulding is where officers take an interest. One phone call before the timber is cut is cheaper than an enforcement conversation.
Keeping water off the next one
Clear the drip groove once a year with a screwdriver or an old chisel. Repaint the underside and the front edge on the same cycle as the rest of the window, carrying the film properly onto the end grain at the reveals, because that is where it fails first. Do not seal the cill to the masonry all round with silicone: if a gap needs closing, close the top and sides and leave the bottom open, so anything that gets in can get out.
Then look upward. A blocked gutter or leaking hopper above a window will destroy a cill in five years whatever it is made of. No specification survives a permanent drip.
Before the autumn rain
Two outcomes, a long way apart. If the bradawl held everywhere and the only faults were flaking paint and a drip groove full of filler, that is a weekend with a scraper, a chisel and a tin of primer, and it buys another decade. If it sank past 4mm anywhere, book the work for late summer rather than February. Cill decay is slow right up until the section loses its strength, and then a splice becomes a new cill, two stile feet and both sashes off.
Whoever does it, have the cords, pulleys and beads checked at the same visit, because the sashes are coming out for a cill anyway. It is the cheapest hour of labour anyone will ever sell you on a sash window. If you would rather somebody else put the bradawl in, we survey across the London boroughs, and cill splicing and replacement is routine sash window restoration work.
Need this doing? We handle rot repair & restoration across London — see our sash window repair service or request a free estimate.