

Wet Rot in Sash Windows: How to Spot It and Stop It
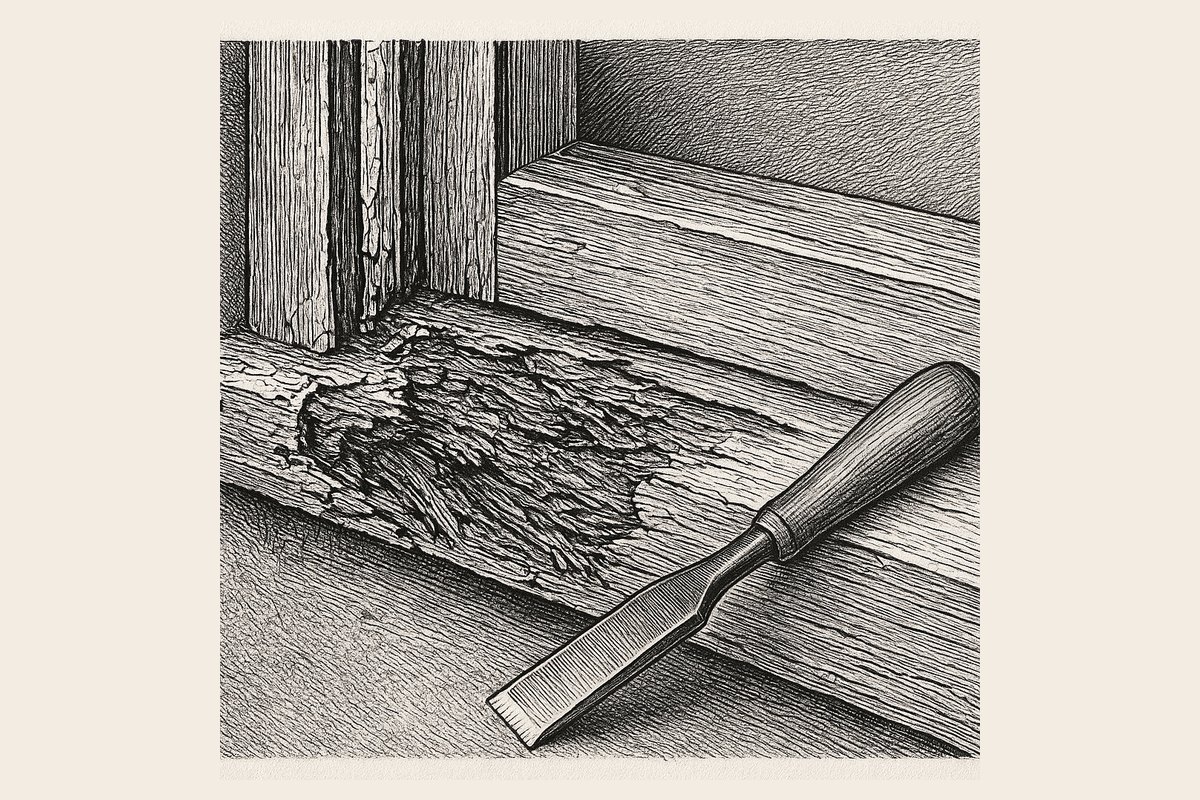
Push the point of a screwdriver into the bottom rail of your lower sash, an inch in from the corner, with about the force you would use on a doorbell. Sound joinery barely marks. If the point sinks in and stays in, you have wet rot.
Wet rot does not roam. It sits where the water sits, which on a box sash means the same three or four spots on almost every window in London. The awkward part is timing. By the time the paint blisters, the timber underneath has usually had two or three winters to get on with it.
Testing the timber, properly
Most people prod one spot, find it soft, and stop. That tells you there is decay but nothing about how much, which is the only question that decides what the repair costs.
- Wait for a dry spell. Timber that has been rained on for a week reads soft even when it is sound, and you will frighten yourself for nothing.
- Find your reference first. Probe somewhere you know is healthy, halfway up a stile or along the top rail, and note how that feels. Your hand needs a baseline before the readings mean anything.
- Work the bottom rail at both ends, then the middle. The ends go first because that is where the mortice and tenon joints are, and joints breathe open and shut with the seasons.
- Run along the whole cill, and pay attention to where it disappears into the reveal. Decay at the cill ends is common and almost never visible.
- Probe the underside of the bottom rail, the face that meets the cill when the window is shut. Nothing shows there until it is bad.
- Take one staff bead off if the paint is failing at low level, and look at the foot of the pulley stile behind it. Five minutes with a chisel answers a question no photograph can.
- Measure what you find. Push a bradawl in until it stops and mark the shaft with your thumbnail. Depth in millimetres is the number a joiner will ask for.
Two things read as rot and are not. Old putty goes soft and chalky and will take a blade easily, which alarms people who then find perfectly sound rebate underneath. A paint blister can also be nothing more than water trapped in the film, particularly on a south elevation where the sun drives it. Press the blister; if there is firm timber under it, that is a decorating problem.
The reverse is the one that catches people out. Where the paint is unbroken and looks fine, but the surface gives slightly under thumb pressure, the decay is further on than anywhere the paint has already failed. Sealed-in wet timber rots faster than exposed wet timber, because it never gets the chance to dry.
Why drying the wood is the actual treatment
Wet rot is not a stain or a chemical reaction. It is a fungus eating the cellulose out of the timber, most often cellar fungus, Coniophora puteana, and like anything alive it has conditions it needs. Moisture is the one that matters.
Below roughly 20% moisture content, decay does not proceed. The SPAB is blunt about the consequence: the first measure for arresting decay is to eliminate the causes of dampness and promote drying, and chemical treatment is secondary rather than a substitute for that. Exterior joinery on a normally maintained London house sits in the low-to-mid teens, rising after rain and falling back again. Rot only takes hold where something holds the moisture up continuously. A hairline split in the paint that lets water in and then closes over it. A drip groove packed with paint. A putty fillet that has lost its bond. A joint that has opened 1mm at the corner of a sash.
That is why no bottle fixes this. Find the water, stop it, let the timber dry, and the fungus dies on its own. Everything sold as a rot treatment is secondary to that, and applying it to timber that is still getting wet achieves nothing at all.
Knowing which kind of rot you are looking at helps you read the damage. Brown rots, and Coniophora is one, digest the cellulose and leave the lignin behind, so the wood darkens, shrinks and cracks across the grain into small cubes. White rots do the reverse, taking the lignin and leaving pale, stringy, fibrous timber that feels spongy rather than crumbly. Either way, the strength goes long before the appearance suggests it has.
The four places it starts
Water runs down and collects where it cannot escape, so decay follows a route you can predict before you have seen the window.
The bottom rail of the lower sash
The most common site by a distance. It sits square in the weather, it is the coldest timber on the sash so condensation runs down the glass and pools along it, and it carries a mortice and tenon at each end. Once water is in an open joint it has nowhere to go, and end grain drinks far faster than a face does.
The cill, particularly the outer edge and the ends
Cills take standing water as part of the job and rely on a sound drip groove underneath to break the flow before it reaches the wall. Fill that groove with successive coats of paint and the water tracks back along the underside to the brickwork and sits in the timber, out of the light, unseen. A rotten cill is the single repair most often misdiagnosed as a whole-window problem, which is why the window cill deserves its own guide.
The foot of the pulley stile, inside the box
Hidden behind the staff bead, the lower few inches of the pulley stile and the linings behind it can decay for years without a symptom on the face of the window. This is the one that turns a quoted job into a bigger job, and it is the reason a good estimator warns you the price may move once the beads are off.
The glazing rebate, under failed putty
Where a putty fillet has lost adhesion, water gets behind the glass and stands on the rebate. This is the case most often patched cosmetically and most reliably back within two years. If the putty is cracked, hollow or missing, assume the rebate under it is wet until you have hacked out and looked.
Occasionally the underside of the upper sash meeting rail goes too, but only on exposed elevations where wind-driven rain gets past a worn seal.
Whether you need to worry about dry rot
Dry rot, Serpula lacrymans, is the one that justifies real alarm, and the difference that matters is not colour or texture. It is reach. Dry rot can cross non-timber surfaces and penetrate masonry, carrying its own moisture to timber some distance from the original leak. Wet rot cannot. It stays in the wet wood and stops where the wood dries.
Window joinery is unpromising ground for dry rot, because it is exposed and ventilated, and dry rot wants still, humid, unventilated conditions. What should make you stop and get someone in is any of: cotton-wool white growth, rust-red spore dust on the cill or the floor below, strands running off the timber onto plaster or brickwork, or a damp mushroomy smell in the reveal. There is also a useful field test in the strands themselves, which the SPAB notes: dried-out wet rot hyphae stay flexible, while dry rot goes brittle and snaps.
If what you have stops at the wet timber and does not continue into the plaster, the lintel or the floor, you are looking at a joinery job rather than a building problem. Our fuller comparison of dry rot and wet rot in window joinery is worth reading before you commit to anything expensive, especially if you found it inside the box rather than on the face.
What the repair actually involves
Which of the three you need is settled by how much sound timber is left, not by preference or budget.
Consolidation and two-part filler
For shallow decay, up to roughly 10-15mm deep and not running through a joint, the soft material is cut back to firm wood, the surface consolidated, and the void filled with a two-part epoxy repair compound. The products used in this trade, Repair Care's Dry Flex range being the standard in UK heritage joinery, stay slightly elastic so they move with the timber instead of cracking away from it.
This is the one job on the list genuinely worth doing yourself, provided two conditions hold: the decay is shallow, and the timber is dry. Read the datasheet for the grade you buy rather than guessing, because these products specify both a minimum working temperature and a dry substrate, and neither is negotiable. Used as a way of hiding structural decay, epoxy filler traps moisture against sound timber and makes the next repair worse and dearer than the one you avoided.
Splicing in new timber
Where decay is deep or has reached a joint, filler is the wrong answer and new wood is the right one. A decayed bottom rail end is cut back and a new piece scarfed in complete with its tenon, then wedged, pegged and glued. A rotten cill nose is cut back in situ and a new section let in, glued and fixed with non-ferrous screws so nothing rusts and bleeds through the paint in three years. Both SPAB and Historic England guidance point the same way: replace the decayed part, keep the original fabric, match the timber and the section exactly. The method is set out in full in our guide to splicing new timber into a rotten frame.
What you splice in matters. Slow-grown Baltic redwood is the traditional match and takes paint beautifully. For a permanently exposed position, a cill nose or the bottom rail of a west-facing sash, acetylated timber earns its keep: Accoya carries a 50-year above-ground durability warranty and does not feed decay fungi at all. It also needs stainless fixings, and the timber is commonly quoted at two to three times the cost of redwood, so it belongs in the two or three positions that keep failing rather than throughout.
A new sash made to match
Once more than about a third of a sash has gone, once both bottom rail joints have failed, or once the stiles are soft where the cords are attached, a new sash made to match is cheaper and better than a heroic repair. That means a like-for-like sash in the same timber and the same section. It is not a replacement window: the box, the linings, the pulleys and the weights all stay exactly where they are.
Closing the water route
The repair is the easy half. Wet rot comes back to the same window, in the same spot, unless the route in is shut.
- Get the paint film continuous again, especially across the top of the cill and along the bottom edge of the bottom rail. Those two surfaces are almost always the thinnest on the window.
- Scrape the drip groove under the cill until you can feel an open channel with a fingertip.
- Renew any putty that has lost its bond, and paint it once it has skinned, lapping 2mm onto the glass.
- Deal with condensation on the inside. A sash that streams every winter morning is wetting its own bottom rail from indoors, and no filler will ever fix that.
- Look at it once a year. Ten minutes with a bradawl each autumn is most of what preventative maintenance amounts to; our seasonal sash window checklist covers what else is worth doing while the ladder is out.
What the work costs
Prices move with access, borough and how much decay appears once the paint is off, so treat these as the shape of the numbers rather than a quotation.
| Job | Typical London range |
|---|---|
| Localised resin repair, one area | £120 - £250 |
| Bottom rail splice or new bottom rail | £200 - £450 per sash |
| Cill splice, outer section, in situ | £250 - £600 |
| Full cill replacement | £400 - £900 |
| New sash made to match, single glazed | £450 - £900 |
Two things move these figures more than the repair itself: access above first-floor level, where a tower or scaffold can cost more than the joinery, and decay that turns out to run into the box. Ask for both to be priced as possibilities before work starts, not discovered halfway through.
Getting the season right
The part almost nobody plans for is when to do this. Epoxy repairs, putty and paint all need dry timber and a workable temperature, and a London January reliably supplies neither. Filling wet wood in November seals moisture into the one place you were trying to dry out, and the repair fails from behind while looking perfectly sound from the front.
If you have found soft timber going into winter, the useful holding actions are the dry ones. Clear the drip groove. Rake out and cover any open joint at the corners so it stops taking water in. Get the heating and ventilation sorted so the inside of the glass is not running every morning. Then do the timber work properly in spring, when the wood has had a few dry weeks and the filler will cure as it is meant to. One thing not to postpone: if the decay has reached a joint, or the stiles are soft where the cords are attached, book it whatever the month. That sash is carrying weight on failing timber, and cords pull out of soft stiles without warning.
We handle rot repairs, splicing and full sash window restoration across London, and a good share of that work started as timber somebody filled in the wrong month. Whether yours waits until spring or needs attention now is usually a short conversation rather than a survey, and it is the question our London sash window repair team fields most often once the clocks go back.
Need this doing? We handle rot repair & restoration across London — see our sash window repair service or request a free estimate.